By now, you’re probably familiar with these beginner cake frosting tips. You know how to make the frosting, what to do with it, and how to treat your cake after you’re done.
However, it’s important to be completely prepared before actually starting—especially if it’s your first one. Without enough preparation, frosting a cake might take much longer than it should be.
If you're apprehensive at the thought of building and frosting a cake from scratch, these are 10 things to know to get you prepared before you frost your first cake! By following this guide, frosting your first cake will be less stressful and much more time-efficient!

No matter how experienced someone is, cake decorating always takes time. If there are intricate designs involved, it can also take hours.
To ensure that your cake will be ready on time, estimate how much time you’ll need.
Set aside at least two hours for decorating, not including baking and chilling. Then, work backwards to find out what time you should start preparing the frostings and decorating!

Building a cake is quite a long process. You can do everything in one day, but it’s more manageable to do it over several days.
If you're baking your cake layers in advance, it's best to keep them in your freezer.
This helps them stay fresh for up to a week! But, do remember to cling wrap them tightly to prevent freezer burns.
If you’re working with frozen cake layers, you can start decorating them after they're half-thawed. There's no need to wait until they come to room temperature.
In a pinch? Place your cakes in the freezer right after it cools down. It’s better than trying to frost a warm cake, which will only result in your frosting melting as soon as it touches the warm cakes!
Besides giving you more time to focus on decorating, cold cakes are easier to work with. They won’t crumble too much, and it’s easier to make clean cuts.
Read More: 10 Cake Frosting Tips For Beginners To Nail Their First Cake
Your range of cake decorating tools will expand along the way, but you don’t need that many tools to start.
Have these 3 essentials ready for your first project: a turntable, an offset spatula, and a bench scraper. A serrated knife will also help in leveling and torting layered cakes.
A non-slip, heavy-duty turntable keeps your cake in place while allowing you to frost all sides of the cake with a spin of the turntable.
A long offset spatula makes it easier to spread the frosting smoothly on top and between the layers. Get a bench scraper to give your cake a smooth, clean finish.

Piping bags and tips are not a must, but they’ll add more fun to your cake designs!
You can make beautiful rosettes effortlessly with a star-shaped tip, like we did for the Red Velvet Cake.
There are so many piping tips available, and choosing your first ones might feel overwhelming. Check out the cheat sheet below to know which ones to get!
Before you begin, get a clear picture of what you envision your cake to look like. Then, prior to frosting, get all the tools and ingredients you'll need.
This will prevent you from scrambling to find the tools you need. This might result in your frosting softening too much, and making it harder to work with.
The same goes for any kind of ingredients—if you’re going to sprinkle some nuts, chop them up before you start.
When you have everything within arm’s reach, decorating your cake will be a smooth and enjoyable process!
The cake is, of course, the star of the show. For the best results, make sure everything complements the cake.
Vanilla or chocolate are the most common cake flavours to use as a base.
Stick to basic flavours like these ones if you’re experimenting with unique buttercream flavours and colours. That way, the cake won’t overpower the decorations.
However, it’s also possible to make exciting flavour combinations of the cake and frosting!
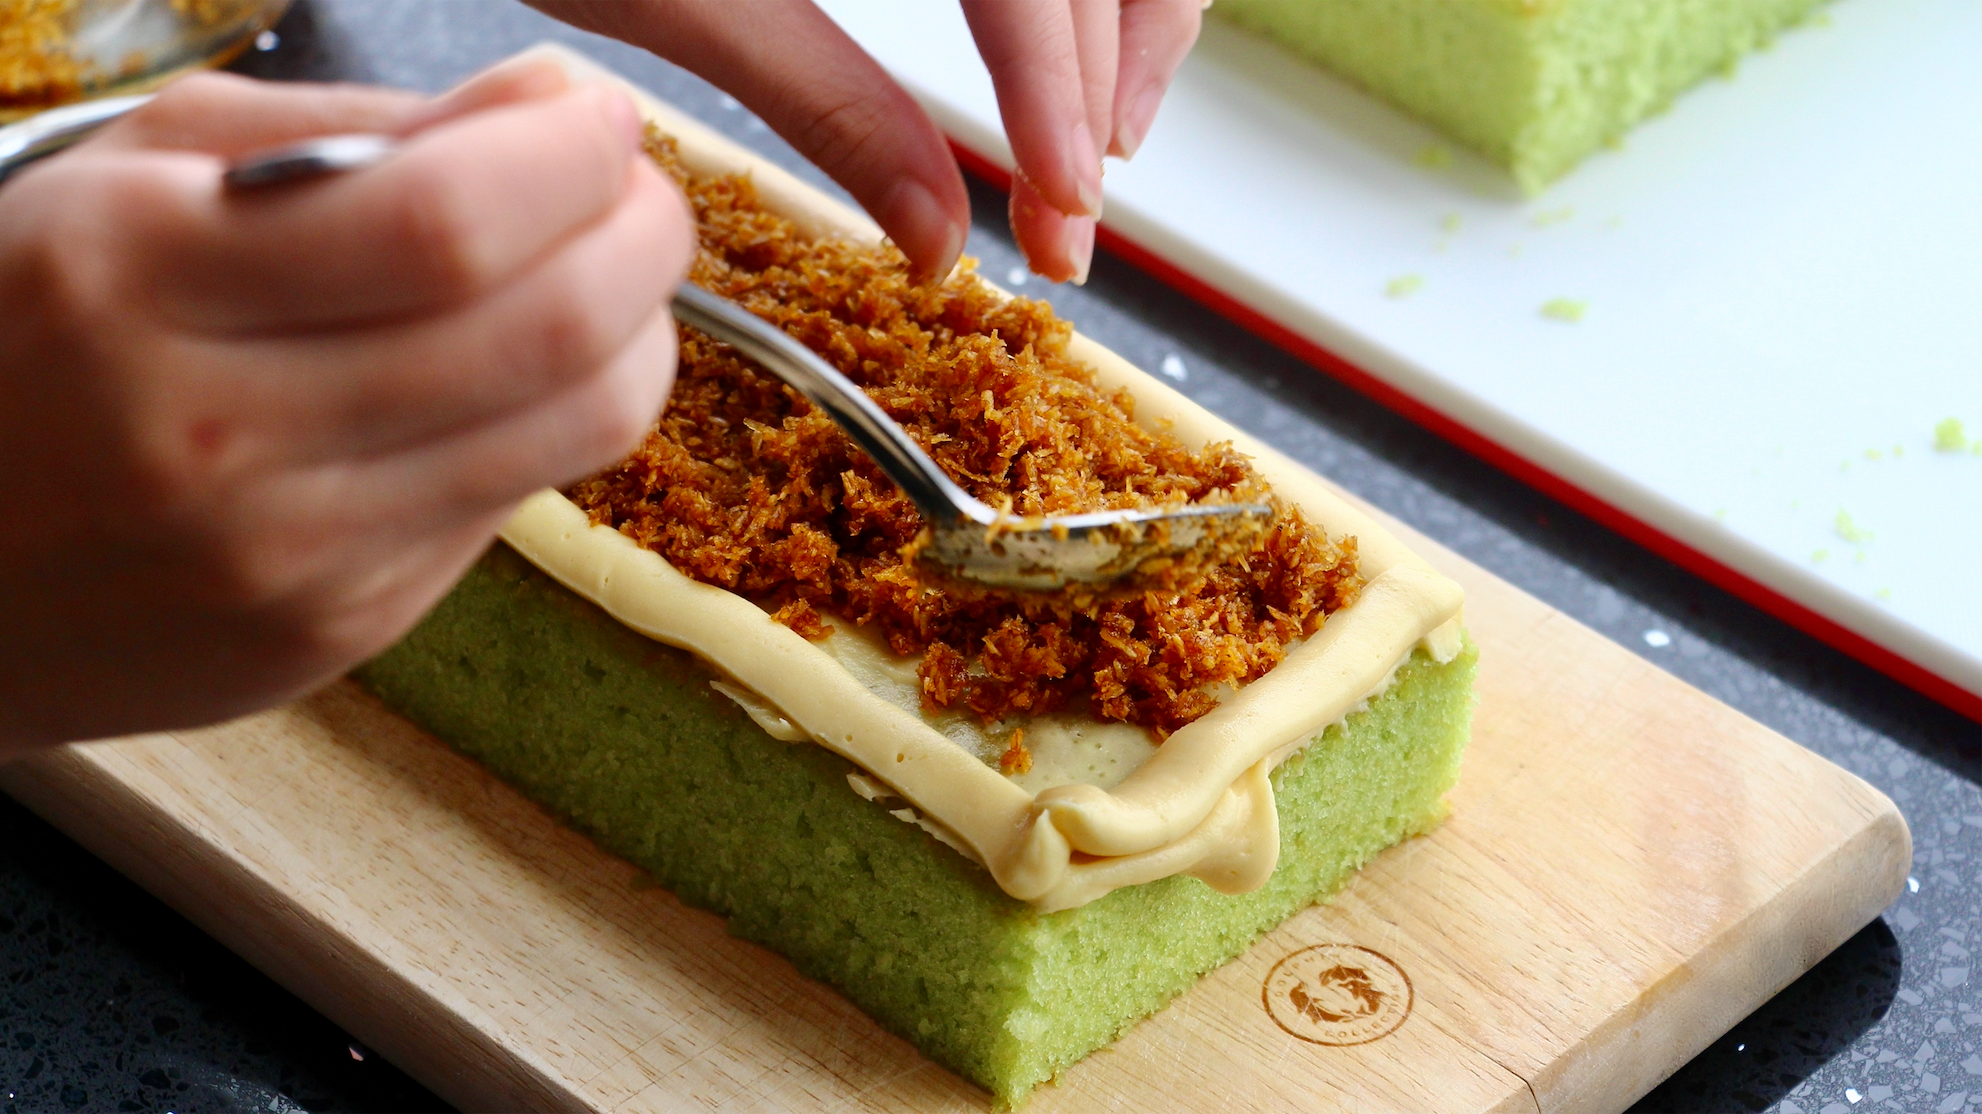
In our Ondeh Ondeh Gula Melaka Coconut Cake, we’re pairing pandan cake with gula melaka frosting for a delightful local taste. Red Velvet and Cream Cheese is also an all-time favourite.
Before making the frosting, know what you’re aiming for.
There are many types of buttercream to choose from. They differ in sweetness, texture, and stability.
Some types are best for making piped decorations, while others are more suitable for filling cakes.

If you’re going to decorate your cake with buttercream flowers like our Red Velvet Cake, choose frostings that are more stable, such as the American or Korean Buttercream.
The softer ones, such as French and Swiss Meringue Buttercream, are best for filling layered cakes.
Read more: 8 Types of Buttercreams and Their Best Uses
The storage conditions/time differ depending on what kind of frostings you're making.
However, it's recommended not to store them for too long as long-term, improper storage will negatively affect their quality.
Keeping the frosting at room temperature will make it too runny, and refrigerating them for too long without proper storage might result in a change in textures, and/or taste and smell.
Instead of running out of frosting mid-way through frosting your cake, it’s better to prepare some extra.
If this is your first time frosting a cake, you might end up using more frosting than you're supposed to, during your trial and errors.
Our Red Velvet Christmas cake baking kit provides you with sufficient frosting to frost the entire cake, and extra to decorate the tops with rosettes and swirls!
Feel free to unleash your creativity and create other frosting designs with the piping bag and star piping tip provided in the baking kit.
Gifting the cake to someone special? Give it an eye-catching colour with some liquid gel dye and use it to write a sweet message!
These three steps are essential in cake decorating, especially when you’re making a layered cake.
Leveling the “dome” on top of your cakes will keep them from toppling.
Meanwhile, torting is slicing the cake lengthwise into 2 or more thinner layers, depending on how many layers you want. Check out this post to find out more!

After leveling and torting, it’s time to stack the cake layers.
Ideally, the top and bottom of each layer must be perfectly flat. Place the uppermost layer with the flatter side up for a smooth, clean surface!

Creating the details on your cake is something that takes practice.
This includes making rosettes, swirls, or patterns on your cake using piping bags and piping tips.
Cake decorating skills come with experience and practice, but even if this is your first time, there’s no need to worry!
Practice making the decorations on wax or parchment paper to gain confidence, before doing it on your cake. If anything goes wrong, you won’t need to redo the frosting.

Frosting your first cake is a chance to try new things and find out what works best.
In the end, there’s no shortcut to making professional-looking cakes; it only comes with experience and practice!
The 10 things above are worth considering before you start. They will help you avoid any mishaps in your very first project.
Apply these tips when trying out our Red Velvet Cake or Ondeh Ondeh Gula Melaka Cake for the best results! Besides following the detailed instructions on the recipe card that comes with the kit, these tips will definitely be useful.

Comments will be approved before showing up.